Bed and Breakfast Website Photography
Photographs are a large part of having a successful Bed and Breakfast website. They will not help you get found in search engines and they will not automatically bring more people to your web site, but good photographs will help convert website visitors into actual guests. Travelers are often leery about what they can not see. So poor quality pictures or too few photos, often result in poor conversion from browser to guest. Great photographs of your Bed and Breakfast will impress visitors to your website more than anything you can write or any other "cool" website effect can achieve.
Common mistakes of B&B website photography
- Small photos
- Fuzzy photographs
- Poorly lit photos
- Poorly compressed photos that are larger than they appear and take too long to download
- Photos that resemble snapshots
- Pixilated photos - photos that were small made larger
- Photographs saved in the wrong file format
- Photos of things that are not central to your mission
- Photos of clutter in your rooms
Tips for better photographs on your B&B website
- Hire a professional photographer. I have often created a website from photos taken only by the innkeeper. This, despite my best abilities, often ends up looking less than perfect. There is a big difference between being pretty good at taking snapshots on vacation and taking professional looking room or architectural photographs. A good photographer is worth the few hundred dollars for a photo shoot of your property. Keep in mind that the cost is tax deductible. Be sure to ask up front if they have experience shooting rooms, and if they have a wide angle lens.
- Supplement with special photos. Your own photos can supplement the professional's. You are there every day and can take a photograph when the setting is just right (sunset, sunrise, perfect fog, right after a snow storm, when the foliage is ablaze, when there is a rainbow over your fence line...). These kind of shots only come along once in a while, so be ready to grab them. Since they are rare, they have a certain appeal that can't be overlooked. If you can, rotate these kind of images seasonally. A good web designer can make it so they rotate automatically depending on the time of year. ;-)
- Use a wide angle lens. A lens in the range of 24 - 29 mm works well for interior photography. Most off the shelf digital cameras can't go that wide. The standard lenses on most cameras can only go as wide as 35 mm (not to be confused with film size), which is usually not enough. Too wide, as in a fish-eye lens, makes things seem too distorted and should also be avoided. If you have a wide angle lens (or hire someone with one) be sure to keep it w-i-d-e. Turned on its side all you get are really tall narrow photos that make you feel like you are spying through a picket fence.
- Turn on all the lights -- Turn on every light you can find. Your eye adjusts for dark regions, but the camera can't. If needed, bring in an extra lamps. Professional photographers may get around this by using slave-flashes.
- Avoid catching windows in the photos on bright days as this will either cause the interior to look dark or the exterior to be too bright and attract too much attention. Timing your shots around twilight can help minimize the huge contrast between inside and outside light. If this is not possible, one technique is to use a tripod and shoot one shot where the inside is the focus and lit appropriately, and one shot where the outside is lit appropriately (without moving the camera) and then digitally join the outside image beyond the window to the inside image. This way they both are lit correctly and both visible in the photo. If done correctly it looks great, if done poorly, it looks fake and gives the impression you are trying to hide something.
- Careful with the flash. Use the flash to get enough light if you must, but be cautious of bounceback off of mirrors and windows. This can sometimes be "photoshop-ed" out of the image, but it takes time which leads to higher costs.
- Open doors whenever possible in the photos. Open doors are inviting, closed doors are not. Though be smart about it, if the open closet door shows a closet stuffed with junk, its better to keep the door closed.
- Check for neatness. Are the lampshades and pictures on the wall level? Bedspread and pillows as they should be? If something is out of place, it should be intentionally so, like an attractive cup of tea on the nightstand.
- Highlight your focus. If you have a piece of furniture you are trying to highlight, You will still need to capture the surroundings so you may want to draw the eye to the piece by putting a brightly colored vase of flowers on it. Or arrange some lighting so the object seems to have its own glow.
- Add some props that would give a warm comfortable look (props are separate from clutter). A bouquet of flowers, wine in a duet of glasses, an open book on the chair, a cup of tea, light the fireplace, drape a towel over the edge of the tub. Caution, avoid showing things that you actually would not allow. Don't show candles burning romantically if you don't allow candles. Don't light the fire, if guests are not allowed to use them.
- Remove distractions. There is no need for items like garbage cans, kleenex boxes, or plastic cups to be visible in your photos. They are essential for a comfortable stay, but they don't need to be seen on your website.
- Remove clutter (and don't let it return). An all too common feature that turns guests off from B&B's is a guestroom full of clutter. Your favorite doll collection, toy collection, fake dessert collection, or a collection of any kind does not belong in a guest room. These are the things guests roll their eyes at and make fun of after they have left your B&B and are telling people NOT to stay with you. By putting these in your pictures, all you are doing is chasing away potential guests. Clutter is not an amenity, don't provide it and don't use it to promote your inn. People like to see places where they can spread out and be comfortable in their own room. If there are no horizontal surfaces free for them to put the things they travel with, there is a problem. Many seasoned B&B travelers actually look at photos to make sure there is no clutter, before deciding to book a room.
- Keep vertical lines vertical. When skewed off of vertical, it usually leaves people with an odd feeling, like they are looking at a carnival funhouse. It is a good idea to keep horizontal lines parallel to the top and bottom of the frame too (but that is not always possible). You will find that in order to do this you will need to lower yourself to somewhere between chest and waist level. It feels awkward but the photos often end up looking much more natural. Avoid having the camera tilt up or down. If at all possible, use a tripod.
- Back up. Try taking some photos from each corner of the room. Back up so you are literally (uncomfortably) into the corner, and squat down a little. Frame the photo to balance the amount of ceiling and floor that appears.
- Use the right file format. Photos should be JPG or PNG but not GIF. JPG and PNG are designed for photographs. The GIF format is designed for graphics with large areas of solid color and no more than 256 colors.
- Optimize wisely. Photos that aren't optimized well for the internet will have file sizes that are either too big and be slow to download or be over optimized and will look grainy or blotchy. The JPG format has a compression level that ranges from 2 to 100. The higher end of the range is less optimized while the lower numbers are more optimized. Generally speaking, 85 - 100 is not optimized enough, resulting in too big a file size, and 2 to 55 is usually too much optimization resulting in blotchy images. Somewhere between 55 and 85 is usually about right. Also as a general guideline you want to shoot for images with file sizes no larger than 75Kb (takes about 15 seconds on a dial-up connection) and even that size you should use sparingly.
- Get the screen size right. Too many websites make the mistake of having ittybitty little photos of rooms (It is ok if they are thumbnail images you can click to enlarge) or the room photos are so big that they take up more space than will fit on the screen, so people have to scroll in order to see the whole photo. Computer screens come in all shapes and sizes so it is impossible to know exactly what size everyone will be using. In general, you want to keep image widths in the range of 550 to 750 pixels (the little dots that make up the screen) and image heights between 450 and 600 pixels.
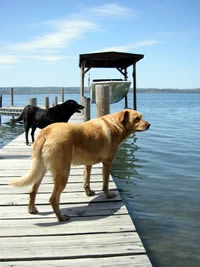
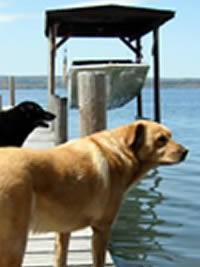
- Never enlarge a digital photo. When you change the size of a digital photo you do it by either adding pixels or losing pixels. When you make the picture smaller, pixels (dots) get removed. The picture may lose some detail as a result but it doesn't lose quality. However, when you make a picture larger, the computer has to add pixels, but it has no information on what color the pixels should be, so it invents the color it thinks ought to be there. This leads to a blocky (pixilated) looking image.
Original
|
Reduced

|
Enlarged
|
The success of your website depends on two things: How many people you get to see your website and how many people you convert into guests. The number of people you get to see your website is controlled by search engine rankings, directory listings and other marketing efforts. How many of those you convert into actual guests is controlled by what you have to offer and how well your web site highlights what you have to offer. High quality photographs of your Bed and Breakfast are essential.
If you still want more advice from pros, this article by Sandy Soule at BedandBreakfast.com is full of information from innkeepers who have hired pros and the pros themselves. Includes links to photographers.
I hope you find this useful.
-Steve
Return to Bed and Breakfast Website Advice
Updated:
|